Since moving from WordPress to Gatsby, I miss having the ability to write blogs posts from the web. While Gatsby gives me the luxury of writing JavaScript, CSS, and CSSinJS, it does take away some flexibility in not having a bundled CMS experience.
Recently I started using Digital Ocean for hosting, and have been experimenting with Foresty, who offers a very simple and powerful CMS that you integrate with any GitHub repo that contains a static site generator. Forestry also gives you the ability to create and assign editing roles.
Here’s the workflow I have set up for now, shown in the diagram below. A Gatsby repo lives on Github, and Forestry serves as an in browser CMS with commits back to Github. A WebHook server on Digital Ocean listens for Github commits, builds the Gatsby site and serves it via Nginx.
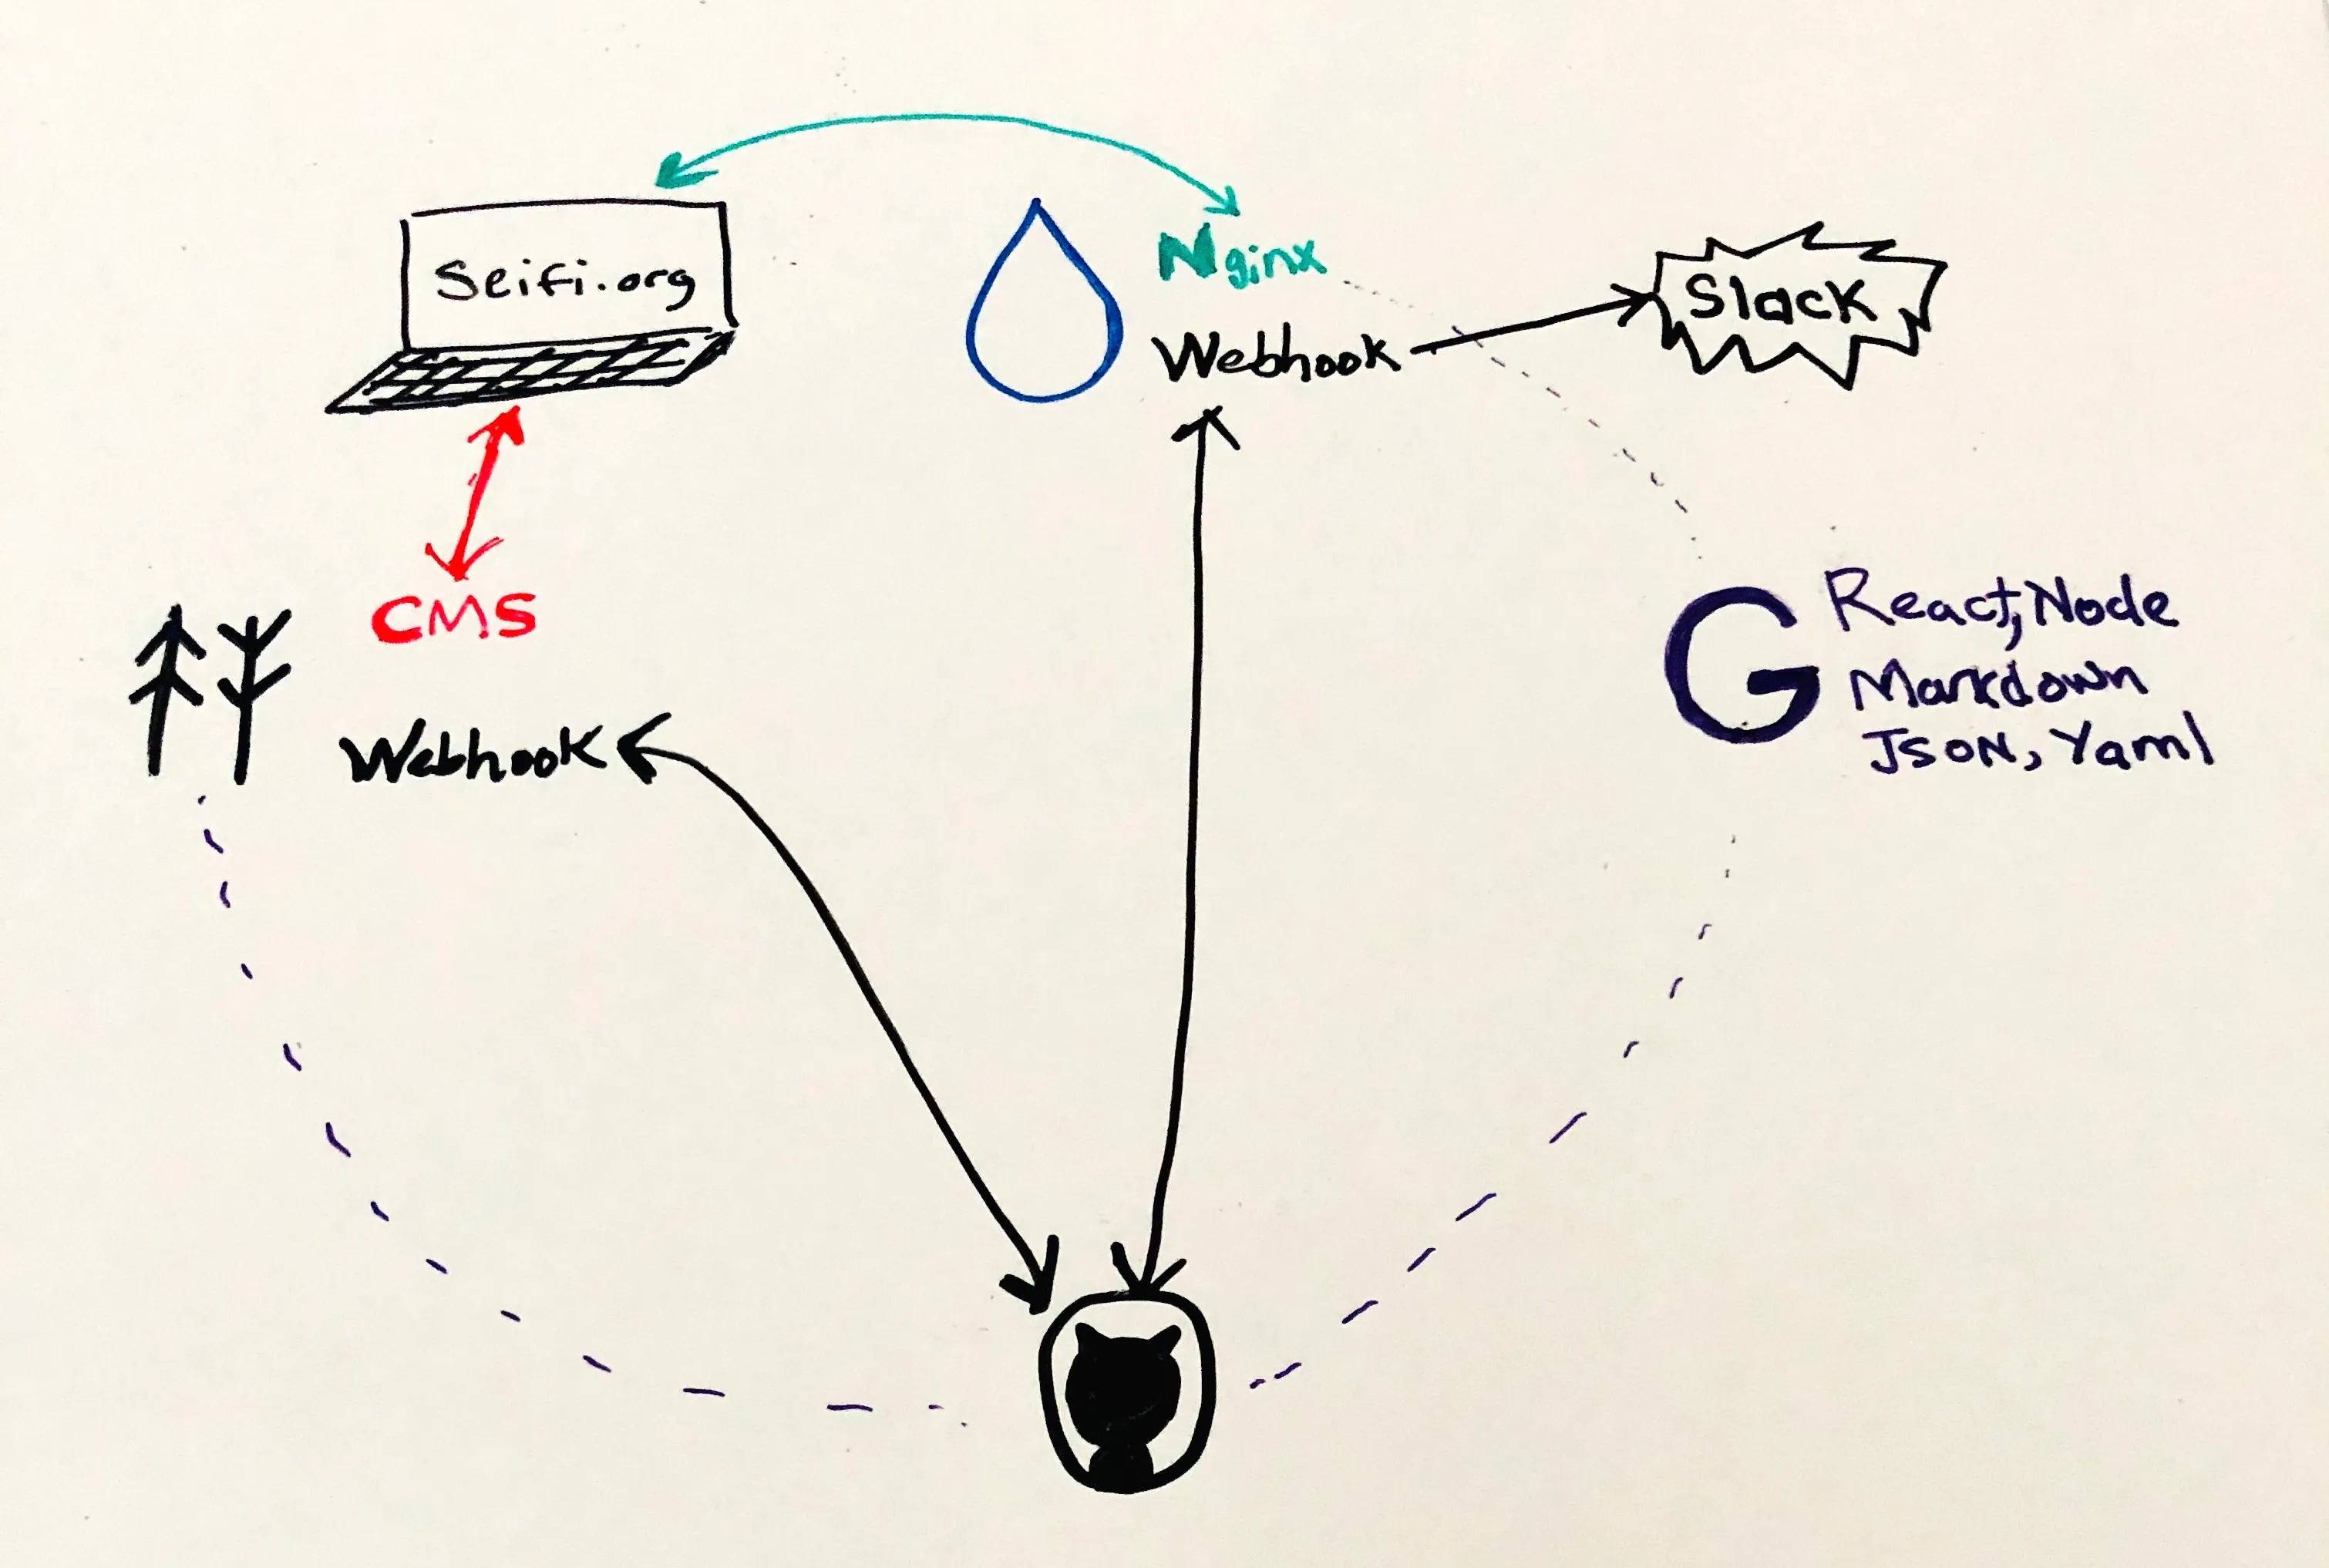
- Gatsby on Github
- Code & Content are version controlled
- Forestry CMS
- Forestry is the web based CMS that commits to Github.
- It also pulls in changes via its own webhook
- Customizable to hook into any VCS / data file
- Webhook server on Digital Ocean
- A webhook server that does 4 things:
- Checks out the latest code from Github
- Installs dependencies and runs tests
- Builds the site
- Sends Slack success / error messages
- Nginx on Digital Ocean
- Serving the built Gatsby site
Gatsby on Github {#gatsby-github}
First things first, check your Gatsby project into Github. GitOps FTW!
Forestry CMS
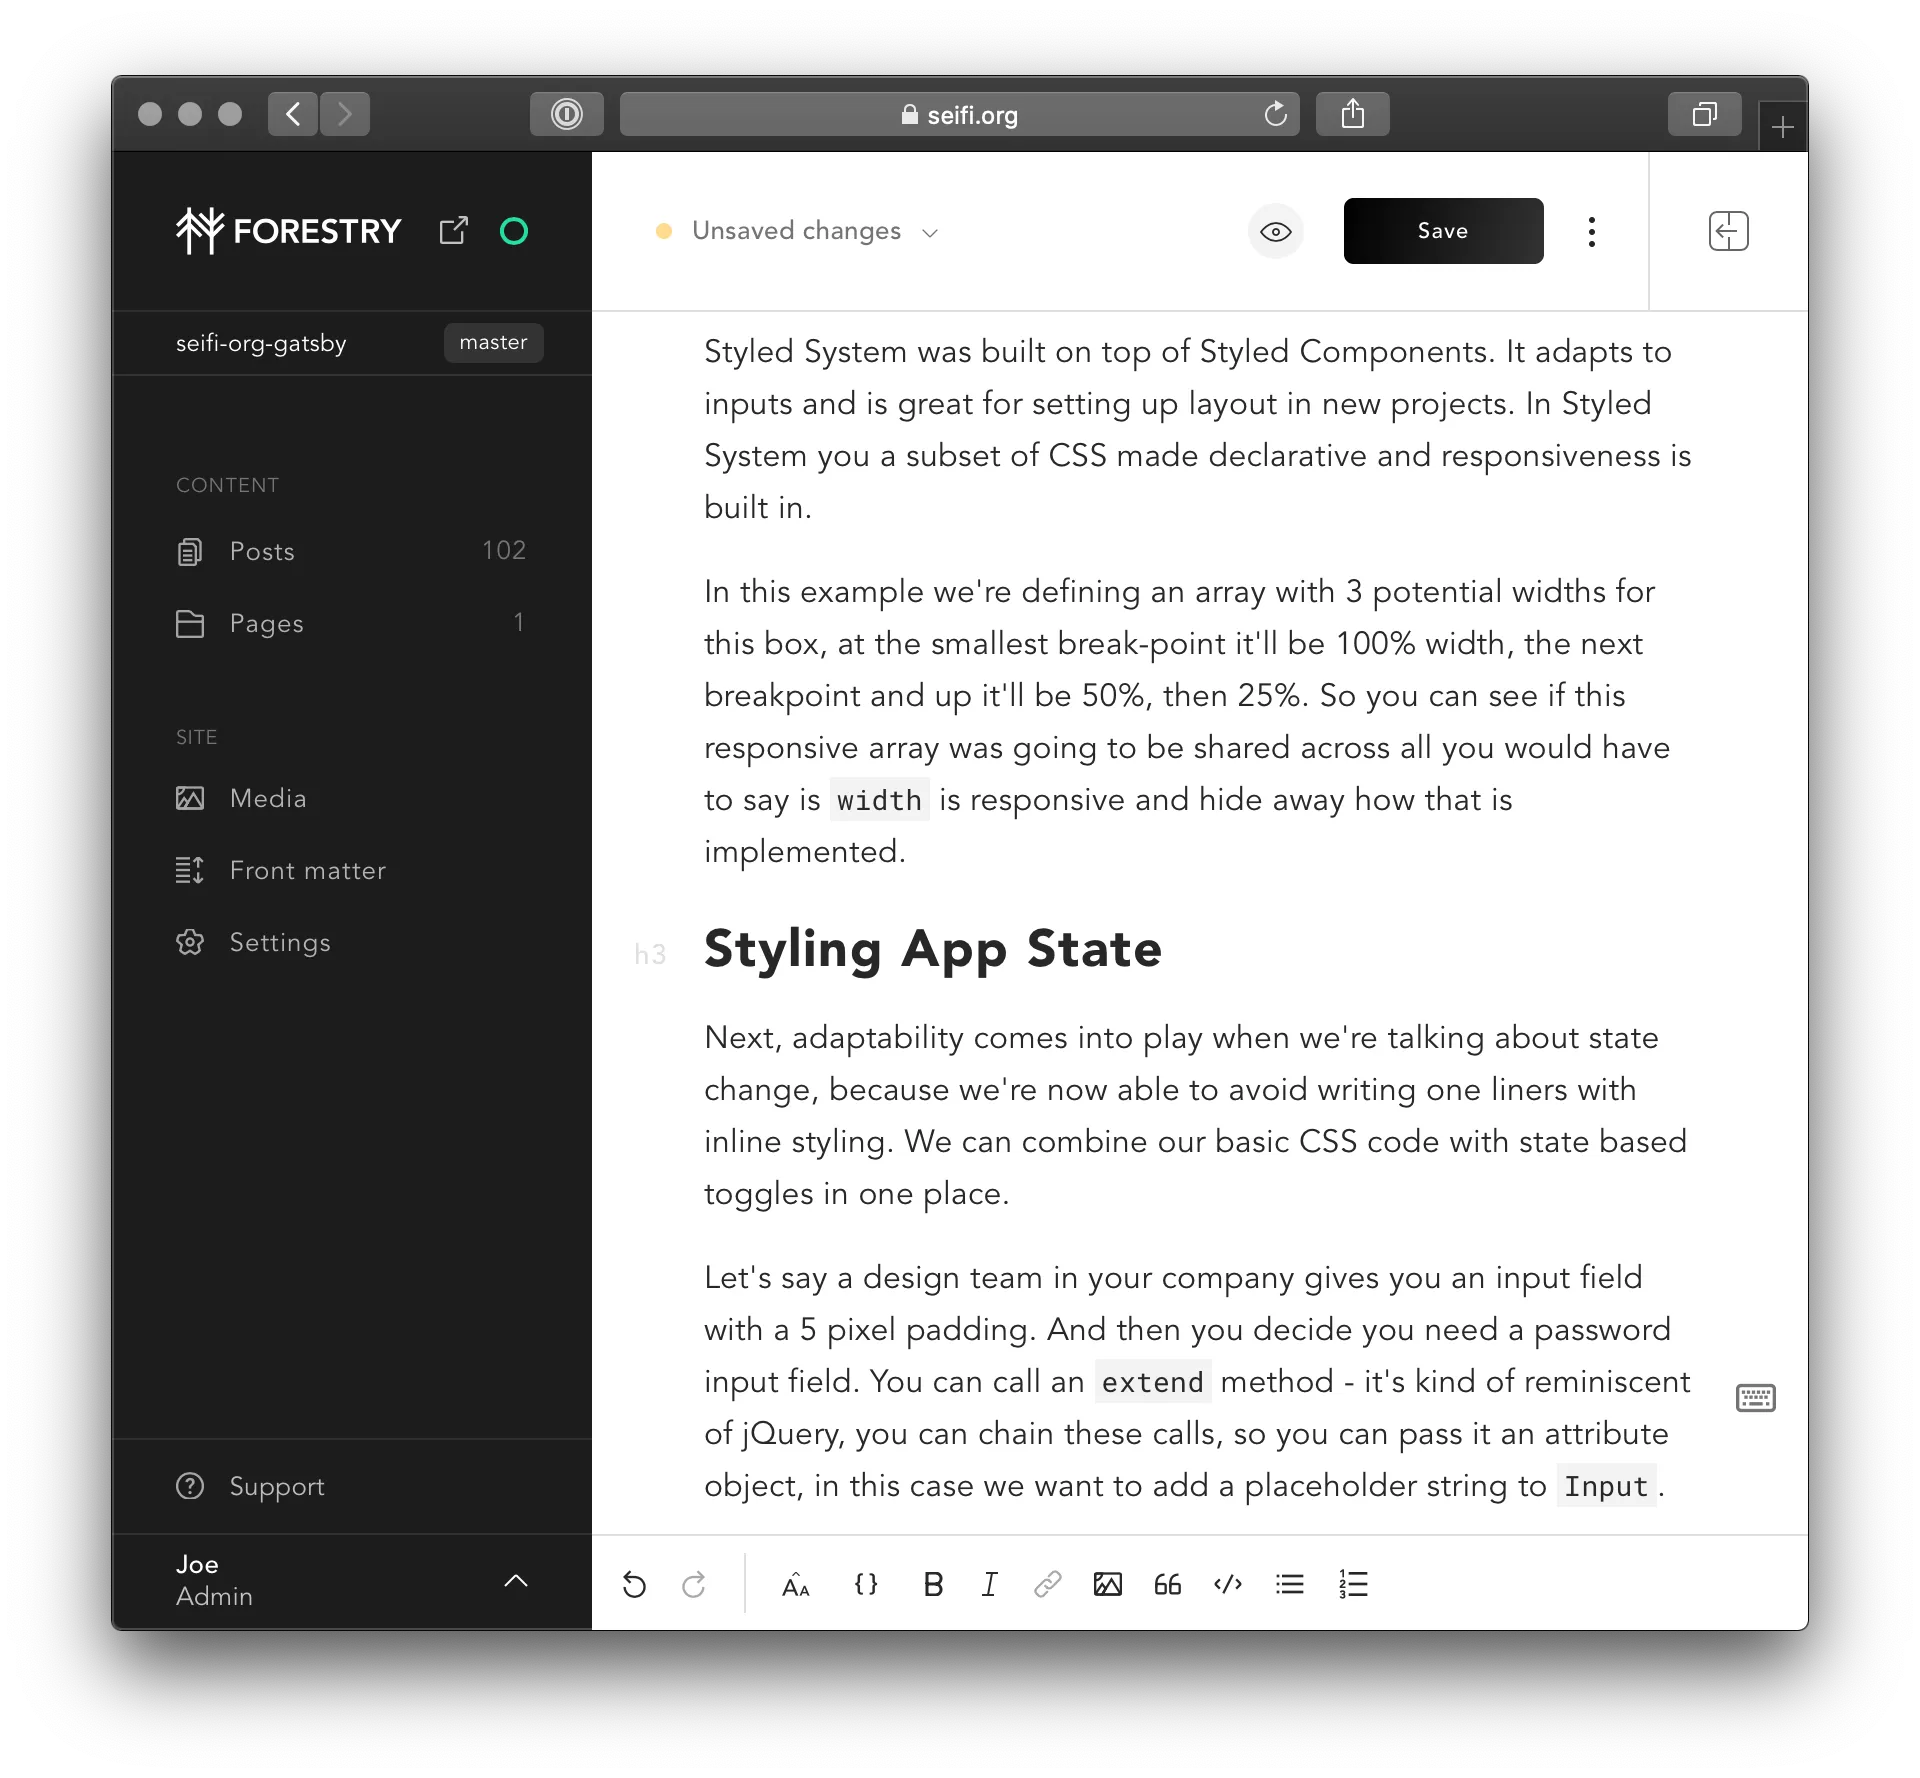
Second sign up for a Forestry.io account and attach to your Gatsby project.
Configuring Forestry for Gatsby
There are tons of great docs on how to map the content of your Markdown, YAML, and JSON files to the Forestry CMS. There are even Gatsby starters you can quickly deploy and learn from.
Mainly you want to create Front Matter Templates for each content type, for example you will have a Blog Post template that maps to your Blog post data files. Forestry gives you fine grained control over customizing your CMS experience. You can add input validation, choose custom input types, add helper text and whole lot more.
If you prefer doing things manually, you can edit the .yml files inside your .forestry folder.
You can upload and mange images inside your repository via the Foresty interface. For extra points you can configure Forestry to use a specific cloud provider to host and optimize your images, to reduce load on your git repo and web servers.
Once this is all set up, you can even self-host the CMS admin UI on your own domain. Basically Forestry pushes an html file to your repo that authenticates you via their API, which is super nice.
Caveats: One of the features that is not currently built into Forestry out of the box is the ability to save a draft or schedule posts for a future date. This means any change you make is immediately pushed to master and causes a build and deploy. Although you can easily build this into your pipeline using CI/CD tools like CircleCI. I plan to write a blog post in the future on using continuous deployment tools with Gatsby.
Webhooks on Digital Ocean {#do-webhooks}
Webhooks are HTTP servers with hooks. Hooks are endpoints that execute code. That’s really all there is to it.
Instal the webhook server
I’m using a webhook server written in Go. Here’s how it’s installed on my Digital Ocean droplet running Centos.
wget https://github.com/adnanh/webhook/releases/download/2.6.10/webhook-linux-amd64.tar.gz

tar -zxvf webhook-linux-amd64.tar.gz
sudo mv webhook-linux-amd64/webhook /usr/local/bin

rm -rf webhook-linux-amd64*
Create a hooks file
We define the hook in a JSON file. Let’s create that now.
sudo mkdir /opt/hooks
sudo chown -R $USER:$USER /opt/hooks
vi /opt/hooks/hooks.json
The hook will run a shell script that accepts some arguments and requires some rules. It will be available at the path /hooks/deploy-gatsby/.
Arguments
The arguments come from Github, and include the person pushing the commit, and the commit message. For a full list of the Github payload values see the Webhook payload example on Github. For example, you can include pusher.email, or sender.avatar_url. Btw, you can use Gitlab or Bitbucket as well, which have their own payloads.
Rules
The hook looks for a secret hash in the payload. In this example it is only going to run when we push changes to our master branch.
Here’s the completed JSON of our hooks file:
[
  {
    "id": "deploy-gatsby",
    "execute-command": "/opt/scripts/deploy-gatsby.sh",
    "command-working-directory": "/opt/scripts",
    "pass-arguments-to-command": [
      {
        "source": "payload",
        "name": "head_commit.message"
      },
      {
        "source": "payload",
        "name": "pusher.name"
      }
    ],
    "trigger-rule": {
      "and": [
        {
          "match": {
            "type": "payload-hash-sha1",
            "secret": "MY_SECRET_TXT",
            "parameter": {
              "source": "header",
              "name": "X-Hub-Signature"
            }
          }
        },
        {
          "match": {
            "type": "value",
            "value": "refs/heads/master",
            "parameter": {
              "source": "payload",
              "name": "ref"
            }
          }
        }
      ]
    }
  }
]
Create a hook script to deploy Gatsby
Now that we have a hook defined, let’s write what we want the hook to do. I’m using a shell script that installs node modules, runs Gatsby build, and sends Slack messages along the way. The cleanup function catches any possible exceptions.
sudo mkdir /opt/scripts
sudo chown -R $USER:$USER /opt/scripts
vi /opt/scripts/deploy-gatsby.sh
Slack Notifications
Slack can accept webhooks. So from our webhook we will call out with updates along the way. Let’s just find the Slack webhook URL.
Go to your Slack project in the Slack app, and choose Customize Slack > Configure apps > Search App Directory for Incoming WebHooks > Add to Slack. Pick a channel and save the integration. Now copy the URL you get back and replace YOUR_SLACK_HOOK_URL with it in the script below.
Here’s the completed hook shell script:
#!/bin/bash -e

function cleanup {
  # Slack - error
  curl -X POST -H 'Content-type: application/json' --data "{\"text\": \"Build failed ${pusher_name} > ${commit_message}\"}" YOUR_SLACK_HOOK_URL
}

# Trap errors & run cleanup
trap cleanup ERR

# grab pass-arguments-to-command
# values from hooks.json
commit_message=$1
pusher_name=$2

# Slack - start
curl -X POST -H 'Content-type: application/json' --data "{\"text\": \"Build started ${pusher_name} > ${commit_message}\"}" YOUR_SLACK_HOOK_URL

# pull latest, install and build
cd /path/to/your/gatsby/project/checkout
git pull origin master
npm i
npm run build

# Slack - end
curl -X POST -H 'Content-type: application/json' --data "{\"text\": \"Build finished ${pusher_name} > ${commit_message}\"}" YOUR_SLACK_HOOK_URL
Start the webhook server
Let’s start the server. By default webhook runs on port 9000 but you can change that using the -port flag. You can confirm the server is running using the URL. You will see Hook rules were not satisfied message which means your server is working.
webhook -hooks /opt/hooks/hooks.json -verbose

# visit
YourServerIP:9000/hooks/deploy-gatsby
Add your webhook to Github
Now open your Github project page, and go to Settings > Webhooks > Add webhook. Paste in your URL, change the content type to application/json, paste the secret string you use above as MY_SECRET_TXT, and pick just the push event as a trigger.
Now you can test the hook. From your local git checkout run an empty commit and push.
git commit --allow-empty -m "Trigger a build"
git push origin master
In your Digital Ocean terminal, you should see logs showing your shell script commands executing, and you should also get Slack messages along the way.
Run webhook as a service
Let’s run the webhook server as a service so we can be sure it is always running in the background. Create a new file at /etc/systemd/system/webhook.service and set a few parameters.
[Unit]
Description=Our very own webhook server
After=network.target

[Service]
Type=simple
Environment=PATH=PATH_TO_YOUR_NODE_BINARY
ExecStart=/usr/local/bin/webhook -hooks /opt/hooks/hooks.json -verbose
Restart=on-failure
PIDFile=/var/run/webhook.pid

[Install]
WantedBy=multi-user.target
Once that file is saved, you can start the service and enable it.
systemctl start webhook
systemctl enable webhook
To take a look at the logs of the service you can use journalctl with the -f flag like this
journalctl -u webhook -f
4. Nginx on Digital Ocean {#do-nginx}
Finally, let’s serve the built Gatsby using Nginx on our Digital Ocean droplet.
All we need to do is set the root to be the public build path of Gatsby.
Cache headers
Gatsby needs very specific cache expires headers, otherwise it will appear to not be updating, especially on iOS Safari. The important files to never cache on a Gatsby site are:
- Anything in the
page-datafolder - Any
htmlfile - If you’re using service workers,
sw.js
Below is an nginx config that handles setting those headers appropriately.
server {
  listen 443 ssl http2;
  server_name seifi.org;

  root /PATH/TO/GATSBY/public;
  index index.html;

  # Gatsby caching rules
  # https://www.gatsbyjs.org/docs/caching/

  location ~* \.html$ {
      expires off;
      add_header Cache-Control "public, max-age=0, must-revalidate";
  }

  location /sw.js {
    expires off;
    add_header Cache-Control "public, max-age=0, must-revalidate";
  }

  location /page-data/ {
      expires off;
      add_header Cache-Control "public, max-age=0, must-revalidate";
  }

  location ~* \.(js|css)$ {
    add_header Cache-Control "public, max-age=31536000, immutable";
  }

  ## SSL certificates go here
}
👋 Thanks for reading. Please let me know if you have any questions or feedback in the comments below.
References
- https://stackoverflow.com/questions/50101784/deploying-gatsbyjs-on-nginx-digital-ocean
- https://forestry.io/docs/quickstart/tour/
- https://forestry.io/docs/hosting/webhooks/
- https://www.writebash.com/advanced-tutorial/make-bash-script-run-as-a-service-in-centos-7-259.html
- https://www.opentechguides.com/how-to/article/centos/169/systemd-custom-service.html
- https://www.digitalocean.com/community/tutorials/deploying-react-applications-with-webhooks-and-slack-on-ubuntu-16-04
- https://unix.stackexchange.com/a/305968/380369