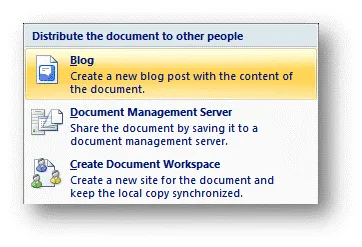
Microsoft Office 2007 has added the ability to publish blogs as well as the ability to upload images to your blog server. Word works with any blogging software that supports the XMLRPC protocol. Luckily all of the popular blogs have by now implemented this standard. I’ve tested these methods in WordPress and Drupal without any issues. Here is a quick tutorial on getting it setup for WordPress. I am actually publishing this post itself from within Word.
Ok let’s get going. Open word and from the new round Office button choose Publish > Blog. This opens up the blog entry view. Then in the Blog Post ribbon click on Manage Accounts > New > and choose WordPress. Then all you have to do is enter the path to xmlrpc.php which is by default https://www.yourdomain.com/xmlrpc.php and your WordPress account login information.

To setup automated picture uploading, click on the Picture Options button and from the Picture provider drop down choose My own server. In the Upload URL enter your full ftp server URL. The default WordPress upload folder is ftp://user:pass@domain.com/full/path/to/wp-content/uploads and the Source URL is the http path to the upload folder for example https://domain.com/wp-content/uploads.
The Insert ribbon allows you to insert images into the blog. Once you add images you can easily Format them using a preset of choices such as drop shadow and mirror effects. The images are all uploaded to the same directory, but the file names are formatted like date_postid_description.ext. For example this image is called 051007_1339_Bloggingwit1.gif. Word tries to optimize the images before uploading them and at times the resulting gif images can look too lossy. It would be nice to be able to configure the image quality. Also I don’t like having all the images in one folder and it would be nice to be able to configure a directory structure for how those images are stored. Lastly the image tags produced by Word are missing the alt, border, width, and height attributes.
You can also insert and format tables, shapes, SmartArt, charts, symbols, and WordArt, and format them using the format ribbon.
Use the Insert Category button to associate your story to a specific category, using a nice drop down menu. To add more than one category click on the Insert button again. Although Word says you can add a new category by just typing it, I was unable to get one to be added and could only choose from existing ones.
Once you are done, you can either Publish your post or Publish as Draft for later use. You can also open existing posts for modification.
Although this is not a perfect solution, it is a great start for Microsoft. The code is actually pretty clean as well. Word uses simple <p>, <em> and <strong> tags to format entries, and uses simple inline CSS for other formatting intensive layouts. If you find that you are getting unwanted markup code in your source, click on the Clear Formatting icon in the Basic Text ribbon to clean out the useless gunk.
Overall, if you are a big fan of the WYSIWYG editor in WordPress and or don’t want to bother with writing html code, this might be a good alternative for you. You give up some control as to what you can and can’t do, but you can perhaps cut out some time and add more layout variety to your posts. Personally I’m not 100% sold on using software to blog but would be interested in test driving other appealing blogging tools with innovative features.